As I have informed to you in my previous
blog,
We should have installed the Java SDK in order to configure your android development.
Installation of Android SDK
Download the Android SDK and start to install,
while you are installing the SDK you may encounter the steps as i have given in below screen shots.
 |
| Installation Step 1 |
after the SDK installation you can select the required API versions other than default packages in the Android SDK Manger wizard.
 |
| Android SDK Manger |
Installation of ADT for Eclipse
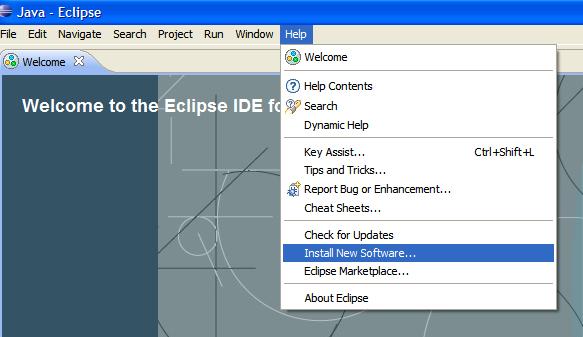
Open your Eclipse IDE and go to help, where you can find a option "Install New Software" Option in the menu as shown in below image.
 |
| Install New Software in Eclipse |
Click on "Add" Button
 |
| Add New Site/Type |
Once you clicked the Add button, system will give above dialog box to insert the values,
where you can give the name as "ADT Plugin" and location as "https://dl-ssl.google.com/android/eclipse/"
 |
| Add Repository |
Once you add the Repository, the IDE will indicate the available installations. where you can select the Developer tool options.
 |
| Developer tool Options |
 |
| Developer tool instillation |
 |
| Developer tool instillation |
 |
| License Agreement |
 |
| Installing the software |
 |
| SDK configuration |
 |
| SDK configuration |
 |
| Final Part of the SDK configuration |


No comments:
Post a Comment